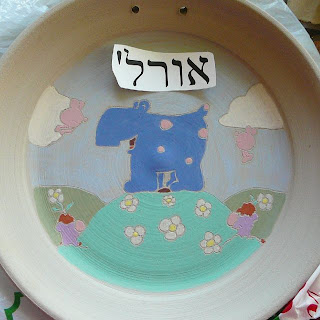
I begin with a plate that has dried to almost leather, meaning it's no longer tacky to the touch, but still has a decent amount of give in its softness.
 I print out a scanned copy of the art I'm using, sizing it to the area I need to cover. Then, because making an impression of this size using the paper leaves remnants of said paper on the damp clay, I trace the pattern onto a piece of plastic wrap using a permanent marker. I then use this to gently incise the pattern onto my plate.
Once the pattern is completely incised, I grab my Amaco Velvet Underglazes and consider my color options.
Then I just start painting. I use a few different brushes, all natural fiber.
I don't worry too much about the details. These can be cleaned up later when the underglazes have dried, but the clay is still moist. For the most intense color I use three coats of each color. Because I'm anal, I only work with one color at a time, allowing each coat to dry in between. The clay tends to absorb a lot of the moisture, so three coats usually doesn't take very long.
For the sky background, because I don't want the plate to be overpowering, I use a "wash" coat of the underglaze rather than the intensity three coats would offer. This is done with a quick single coat.
Then it's time to add the name. I know -- I could have just done it on the same plastic I used for the main picture. But the letters are more delicate and I prefer using the heavier quality of paper for this and, since the paper doesn't sit on the clay for long when incising the name, I don't get any paper fibers stuck to the clay.
Finally, I fill in the letters for the name, use my incising tool to accent the definition lines, clean up any small smudges, and the initial work on the baby plate is done. It will go in for a bisque firing, which will bring out the stronger shades of the underglaze though, unlike regular glaze, they won't change too much from what you see here.
To be continued.........


