Tuesday, October 18, 2011

Time for an update on the standing lamp.

All the pieces have been through both the bisque firing, been glazed with "Hi Fire Clear" and fired up to cone 5. I brought them home, all excited about putting the lamp together this evening. Here are the pieces lined up on our coffee table:

Then we hit our first glitch. I knew we would be able to unscrew the lamp pole from the base; but I completely forgot about the cord! And, this being a very commercial lamp (purchased used, but made in China), detaching the cord from anything proved to be more difficult than I thought.

When Avi (my husband) came home, we unscrewed the bulb housing, only to see the wires were permanently embedded in it. No unscrewing wires here.

For a bit, I pondered creating this as a non-functional piece of art. But Avi loves a good puzzle. In the end, we decided to cut off the plug, pull the wire out from the top, with a lead wire attached to help guide it back through when we're done putting everything together. The wire is out, with the lead wire still in place in the tube. It will be reattached to the power wire and pulled back down through when we're done with everything else. Then we'll just attach a new plug. I'm sure this is all clear as mud. At least Avi and I understand what we're doing.

Then we had fun trying to decide where each section would look best on the lamp. This was what we've come up with:
I've decided I need to make a "cap" to top off the stack and make it fit the top piece of the lamp more snugly. I wouldn't want to just leave a gaping hole at the top. I'll work on that tomorrow. I'm planning on making one concave and one convex, then deciding which I like best when they're done.
So, there'll be another lapse in time from now until the next post. Stay tuned for the next installment.

Thursday, September 29, 2011

You've seen the home side of the new living room project. Now I'll show you what's happening in the studio.

As I said in the previous post, I'm working on making a standing lamp from ceramics. The idea is to throw the lamp in sections. My forms are made so the bottom opening will sit just over the rim of the top opening, locking the pieces in place. They're thrown to fit around a two inch pvc (plastic plumbing) pipe, which will sit over the base lamp, pictured in the previous post. They won't sit right up against the pvc pipe. But there will be about a quarter to a half inch clearance between. Hopefully this will all be enough to keep the lamp stable. I'm assuming it won't be moved much and this will all work well.

So, the following photo is of some of the pieces thrown on the first day. I worked with 3-4 pounds of clay per piece, leaving a fairly thick wall for stability and strength.


I wanted the lamp to be colorful, but not enough to dominate the room. So, I decided to use underglazes and have one color family per piece. The base coat would be a light shade of the chosen color, after which I would sponge paint a darker shade over it to create some sort of pattern. Each piece would have a different pattern. There will probably be two pieces for each color family: red, purple, green, brown, blue. A few of the finished underglazed pieces are below:


I have about one more day's work before the pieces have all been underglazed and touched up. Stay tuned......

Monday, September 26, 2011

The "Cascade Effect" has hit my house. We decided to redo the formal living room, which has now spread to the family room AND the kitchen. Upholstered furniture has been purchased, but I HAVE to leave my mark on things. So, I have several projects in the mix -- one of them even involving clay!

The non-pottery designs are a coffee table and end tables featuring wonderful Chinese silk embroidery with birds as the unifying factor. I purchased an old coffee table, two square stools, and a couple of frames at the Salvation Army. The stools, with the seat removed, will be the bases for the end tables, with the framed embroidered pieces as the table tops. The coffee table will have a longer embroidered piece (purchased on e-bay) under cut glass.

 I'm going to remove the woven seats from the two stools, prime them and paint the bases black to go with the charcoal grey sofas we've ordered. The coffee table (sorry, didn't get a photo of it) will be painted the same way. Finally, a couple of coats of polyurethane will be painted on for a durable finish.

Here are the two smaller silk embroideries. One is already framed, although I might opt to replace it with a frame more like the one sitting in the chair as pictured in the third photo down.


And here's the lamp which will act as the foundation for my standing lamp:

A 2 inch pvc pipe will go over the rod part of the lamp to better anchor the 6 or 7 ceramic cylinders that will be my contribution to its beautification. I'm debating whether to run the ceramic parts of the lamp over the open ironwork and up below the lampshade (so no dark metal shows except for the base), or to use the openwork as an accent. I might make pieces that work both ways and decide when I'm putting the pieces together.

I'll try and remember my camera when I go to the studio tomorrow to show you the individual pieces of pottery, which will be stacked on each other to create my standing lamp.

Friday, July 01, 2011

Last night I did a workshop in our studio on layered underglaze/colored slip surface decoration. It's a technique I learned when I attended The Surface Decoration workshop through the Potter's Guild in Temple, TX a couple of months ago.

I've been playing with the technique all week and have become incredibly inspired by the process. I'll walk you through the workshop so you might become inspired as well.

Here's the initial setup for the workshop. From the left side: slab prepared for platter demo, tile prepped for technique demo, sample stencils/sample patterns/heat wire, plaster molds, samples of finished pieces using technique. Please ignore the soft drink in the photo. It's not mine.


This is the stencil I used for the platter. It's adapted from a Judaica papercut. Papercuts are, for all intents and purposes, stencils. After sizing it correctly, using Picasa software, I traced it onto my .010 Lexan and cut it using a stencil heat wire. I'd say the stencil took me about two hours total, from printing to finished piece.

First I did a demo on a tile I had prepped earlier. (Everyone had two tiles to play with -- everyone only had time enough to complete one.) The prep involved painting black underglaze on the surface of the tile and allowing it to dry to matte consistency, while keeping the tile itself moist and pliable.
 I began by carving a series of angled lines as a backdrop. The lines will fire the color of the clay which, in this case, is low fire white.


You could just as easily make swirls, geometric patterns, or not carve at all. But the technique is about layers, so I carved.

 Being a little bit OCD in the studio, I used a ruler for my lines.

Then I took a stencil (a commercial one in this case) and used a rolling pin to embed it into the clay. 

The idea is you want the clay to come up so its surface is level with the top of the stencil. This will prevent your underglaze or slip from bleeding, giving you a crisp, clear image.


Because I used a black foundation color, which muddies overlying colors, I put a base coat of white underglaze. This acts the same way a primer does, helping your lighter colors pop. If you're going from light base to dark, this step is probably not necessary.


Then we had to "hurry up and wait" for this base layer to dry to matte. When the tiles are done, and dry enough, they'll be placed on a plaster slab and rolled over, to flatten the design side. It's important to compress the layers, leaving a smooth surface. This decreases your chances of cracking along stress lines created by carving and raising clay through the stencil/s.


At this point I had everyone base coat their tiles with the color of their choice.

While all the tiles dried I moved onto the platter demo .


Remember the stencil in an earlier photo? I used it for this platter. Since the stencil would block the pattern, I used Fossil Gray Amaco Velvet underglaze, which would give me a stonelike effect. It's fires gray with tiny black spots. 


When that dried to matte, I rolled on my stencil and used Medium Blue over it. This was the result when I peeled off the stencil.


I placed my "Shabbat" (in Hebrew, since I do Judaica) stencil over the centerpiece of the slab, trying to center it correctly.


Then, just as on the tile, I used a roller to fix it into place, again making sure the clay came up level with the top of the stencil.


Using black underglaze, I painted on a couple of coats and waited for it to set.


It doesn't need to dry completely before removing the stencil. It just needs to set enough so it won't smear.


Here it is, with the stencil removed.


Throughout the process, it's important to make sure your slab remains pliable. I do this by spraying plastic and laying the slab over that. Then, periodically, I pick up the slab and spray some more. Since the slab is about 1/2" thick, this keeps the clay pliable, while still allowing the surface colors to dry.


Once my underglazes have dried so they're no longer tacky to the touch, I cut out my platter.


Now let's backtrack a couple of steps. While I was waiting for my underglazes to dry, I took a plaster hump mold and centered it on a foam bat. I'll be using this to shape my platter.

Here I've begun shaping the slab against the mold using a rubber rib. You could just as easily use a wooden one. The idea is initially to use lighter pressure, molding the clay to the shape of the mold.

I slowly increased pressure on the clay, both compressing the piece and trying to flatten out the textured layers from the carvings and the raised stencil parts. This is to prevent cracking from multiple sources: not enough compression of the slab (especially on a larger piece), stress from the carvings and raised lines from the stencil. This also gives a nice, smooth surface to the inside of the functional piece.

Compress, compress, compress.........

When I feel I've finished compressing, I take a serrated rib and score the bottom where I want to place my foot. I do this while the wheel is moving, making it simple to be sure the foot will be centered. The step missing here is that I trimmed the rim of the platter with the pointed tip of a sculpting stick. Then I used a damp sponge to smooth off the sharp edge. Then I just trimmed up a little along the inside. I smooth that off when the platter is removed from the mold.


Then I put slip over the scoring. I'm using slip made from my clay body with water and a little vinegar to act as a flocculant.

I've made a coil using a handle cutter. You could just as easily roll one or use an extruder. I've scored the coil, slipped it, and joined it to the bottom of my platter.

I laid the ends of the coil one over the other and make an angular cut through both, to create a joining edge. I set the wheel to spin and work with the foot, centering it and bringing clay down to join it seamlessly to the body of the platter. I work on this a bit, making sure the foot is compressed, centered, and well joined.

Here's a photo of the finished platter (note the cleaned up edge), and a bit of the tile with Amethyst having been painted over the white base.


 The technique has all sorts of possibilities. I encouraged my students to play with it, telling them I'd love to see where they take it and how they make it their own.

Tuesday, May 31, 2011

This is a bit more of the pieces I saw at the Ceramics Museum in Havana. This next group begins to give a feel for the lack of "things" in Cuba. Many ceramic artists have little or no access to the basic chemicals (not the lack of glazes on these pieces). As a result, many of them use oxides and firing methods to color their work.

A future post will deal with an artist I met at her studio in Camaguey, a city located in central Cuba. But, for now, let's get to the art, shall we?

This piece was a combination of a mural and a few three-dimensional pieces. 


I lived in Mexico for many years. A potter named Ken Edwards used iguanas as his trademark. This artist does the same thing, but takes it a little farther. I enjoy the whimsy of these three-dimensional creatures stalking the small, two-dimensional, more primitive bird painted onto the surface of the vessel.                


A lttle bit of glaze to accentate the octopus, then a matte surface as background. I'm beginning to wish I had taken notes regarding each photographed piece.     

This was quite a large piece, with a sgrafitto'ed design on it.  It has a wonderful rustic feel!                                                       

Damn the embargo! I could have bought this artist's work at a gallery in Havana la Vieja. But I was afraid it would be confiscated. You're allowed to bring in "art", but nothing of a touristic nature. Who decides? The customs agent. I didn't want to take a chance.                              

This is a large piece. I know it's difficult to tell the scale. I would say it was about 3 feet tall. It's also a vessel. The thumb is removeable so you can "use" the hand as a container. I think I looked at this piece a good long time because of the wonderful detailing the artist put into his figurative design.                                                   

Sunday, May 08, 2011

And yet some more wonderful pieces from the Ceramics Museum in Havana.

 A wonderful altered and cut piece.
 As a birder, I love this clever piece with two owls sitting atop it.
 A closer look at the two owls. Texture is sometimes a key element in design.
 The next two photos are "sets". I always find it interesting how an artist can create different pieces that have the same voice.

Wednesday, May 04, 2011

Let's see some more from the Ceramics Museum in Havana, shall we?


Over the years I've come to appreciate how surface treatment/decoration can elevate even the simplest piece.


Don't you love how the decoration works to elongate the above bottle shape?


And how about the modernization of a dragon theme?


This "book" was wonderful. I marveled at how thin the artist was able to get the "pages".

More to come in a bit.........

Thursday, March 17, 2011

Just got back from a ten day trip to Cuba. It was a trip concentrated on birding -- but I was fortunate enough to visit an artist who lives in Camaguey, as well as the Ceramics Museum in Havana. So, over the next few weeks I'll be slowly posting photos of some of the work I saw.

Let's start with wall hangings and murals. This first one is a tiled fish at the Ceramics Museum in Old Havana (Habana la Vieja).


I love the whimsy and textures in the piece.

This next one is a mural hanging at the entrance to the Hotel Camaguey, in Camaguey. There is a feminist theme running through a good deal of Cuban art. This mural exemplifies that:


Another, more abstract mural was on the patio of a gallery in Habana la Vieja. Again, I loved it's play of textures and colors:


It's quite a large piece, so I was only able to capture a small part of the details (see below the patio shot).


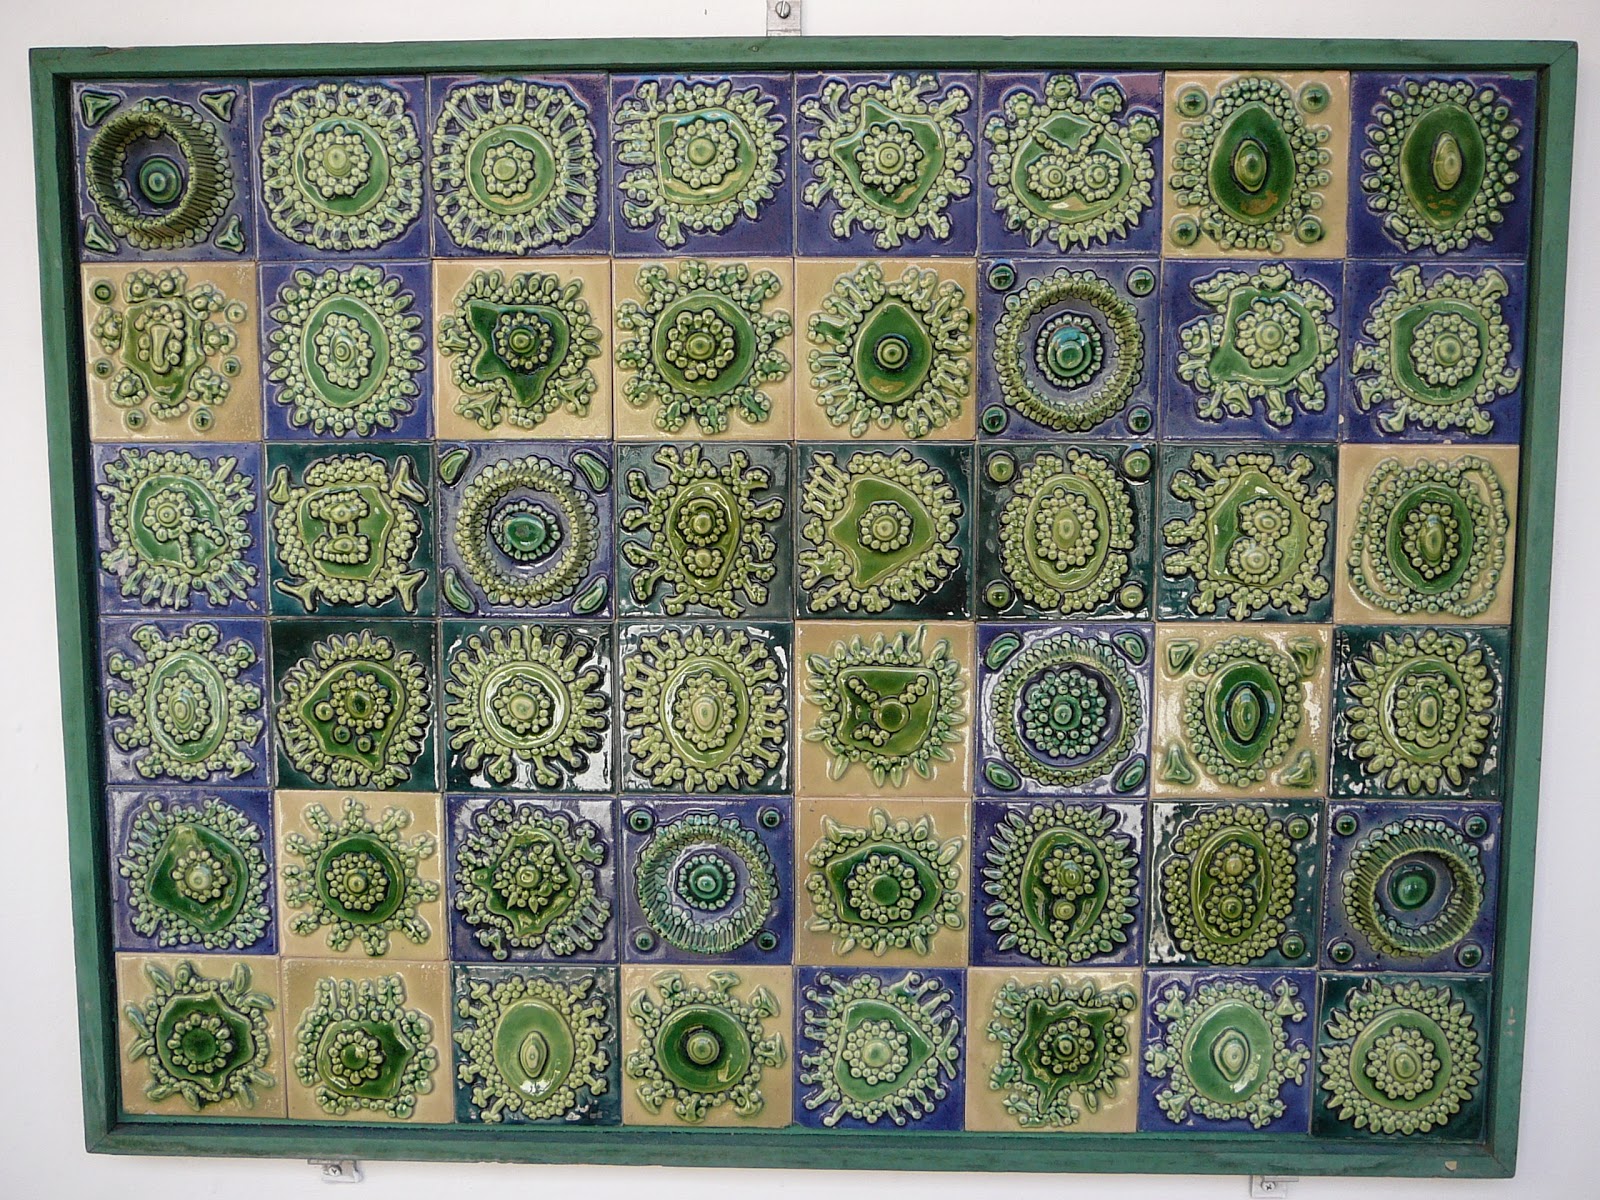
Another small piece was, again, at the Ceramics Museum and, again, I was intrigued with the textures used in its tiles:

Finally, an impressive work of the Revolution located on the second lobby (second floor) of the Havana Libre Hotel -- formerly the Hilton, opened at the wrong time (just before the Revolution closed it down).

Its title, if I recall correctly, is "Carro de la Revolucion" (The Revolutionary Car) by ceramist Amelia Peláez. It contains 525 pieces of clay tile with metal inserts and is fashioned after the style of Picasso.