Showing posts with label bowl. Show all posts

Friday, July 12, 2013

What to Do with Seconds

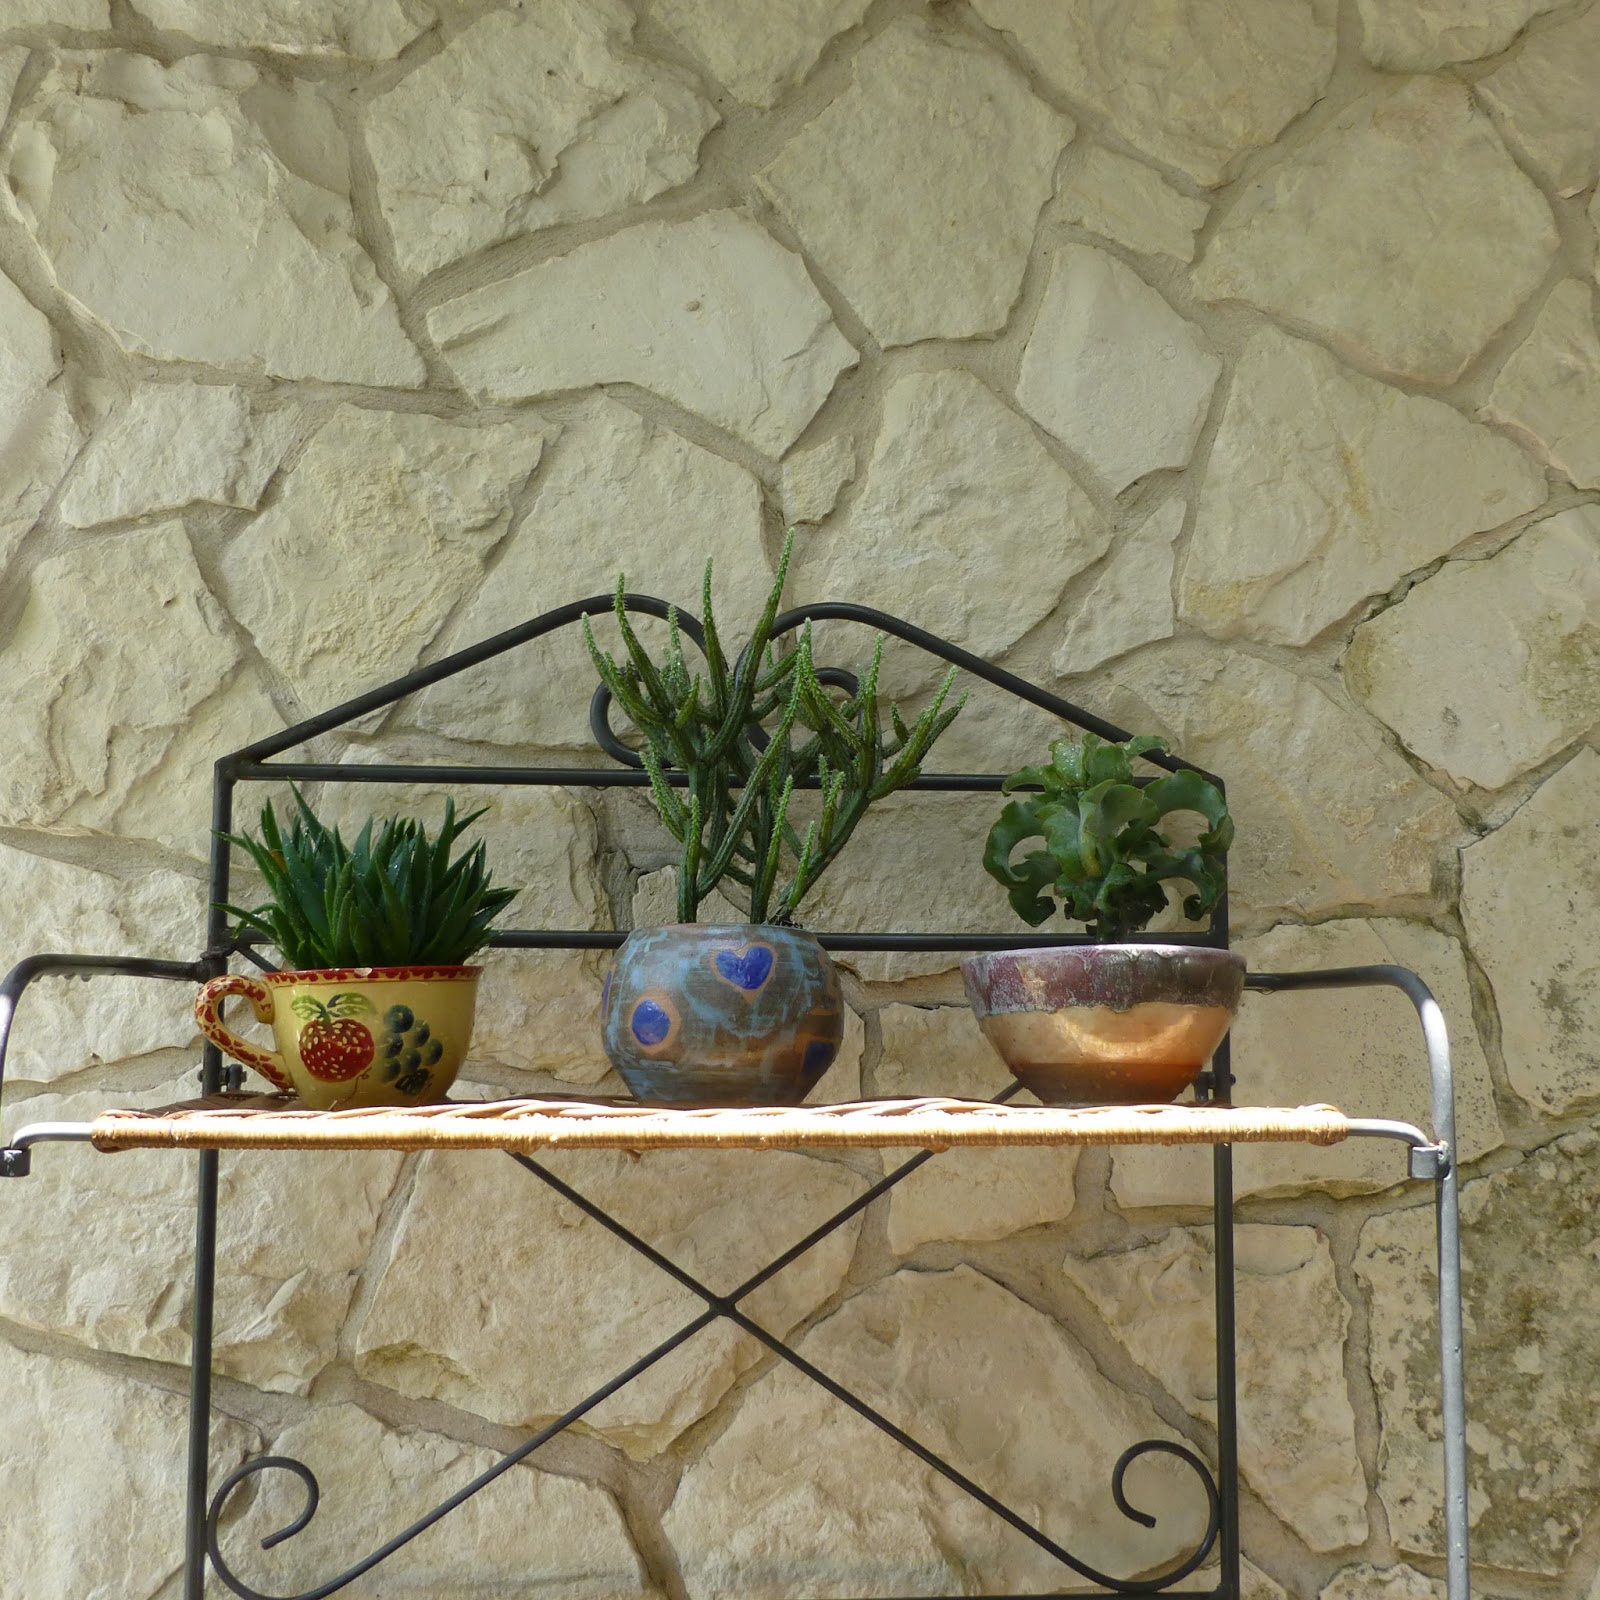
With a garden full of new landscaping/hardscaping and a bunch of pottery seconds sitting in my house, I decided to take action and enhance our new front patio.

Happily, on large trash day, Avie found a discarded baker's rack, which we absconded with and put up in front. Then I checked out my seconds, consisting of pieces I'd made which had something I didn't like. I also took a trip to our local Goodwill for a few extra pieces, to fill in the blanks. Then I tallied up the sizes of our pottery pieces.

Finally, we went over to our favorite garden shop and purchased a lot of succulents to fit into these vessels. The result: NICE!!!!


As time goes on, I'll see how these cuties do. I'll probably add to the collection as I accumulate more pottery seconds, or find some in the wild.

What do you do with YOUR seconds?

Friday, July 01, 2011

Last night I did a workshop in our studio on layered underglaze/colored slip surface decoration. It's a technique I learned when I attended The Surface Decoration workshop through the Potter's Guild in Temple, TX a couple of months ago.

I've been playing with the technique all week and have become incredibly inspired by the process. I'll walk you through the workshop so you might become inspired as well.

Here's the initial setup for the workshop. From the left side: slab prepared for platter demo, tile prepped for technique demo, sample stencils/sample patterns/heat wire, plaster molds, samples of finished pieces using technique. Please ignore the soft drink in the photo. It's not mine.


This is the stencil I used for the platter. It's adapted from a Judaica papercut. Papercuts are, for all intents and purposes, stencils. After sizing it correctly, using Picasa software, I traced it onto my .010 Lexan and cut it using a stencil heat wire. I'd say the stencil took me about two hours total, from printing to finished piece.

First I did a demo on a tile I had prepped earlier. (Everyone had two tiles to play with -- everyone only had time enough to complete one.) The prep involved painting black underglaze on the surface of the tile and allowing it to dry to matte consistency, while keeping the tile itself moist and pliable.
 I began by carving a series of angled lines as a backdrop. The lines will fire the color of the clay which, in this case, is low fire white.


You could just as easily make swirls, geometric patterns, or not carve at all. But the technique is about layers, so I carved.

 Being a little bit OCD in the studio, I used a ruler for my lines.

Then I took a stencil (a commercial one in this case) and used a rolling pin to embed it into the clay. 

The idea is you want the clay to come up so its surface is level with the top of the stencil. This will prevent your underglaze or slip from bleeding, giving you a crisp, clear image.


Because I used a black foundation color, which muddies overlying colors, I put a base coat of white underglaze. This acts the same way a primer does, helping your lighter colors pop. If you're going from light base to dark, this step is probably not necessary.


Then we had to "hurry up and wait" for this base layer to dry to matte. When the tiles are done, and dry enough, they'll be placed on a plaster slab and rolled over, to flatten the design side. It's important to compress the layers, leaving a smooth surface. This decreases your chances of cracking along stress lines created by carving and raising clay through the stencil/s.


At this point I had everyone base coat their tiles with the color of their choice.

While all the tiles dried I moved onto the platter demo .


Remember the stencil in an earlier photo? I used it for this platter. Since the stencil would block the pattern, I used Fossil Gray Amaco Velvet underglaze, which would give me a stonelike effect. It's fires gray with tiny black spots. 


When that dried to matte, I rolled on my stencil and used Medium Blue over it. This was the result when I peeled off the stencil.


I placed my "Shabbat" (in Hebrew, since I do Judaica) stencil over the centerpiece of the slab, trying to center it correctly.


Then, just as on the tile, I used a roller to fix it into place, again making sure the clay came up level with the top of the stencil.


Using black underglaze, I painted on a couple of coats and waited for it to set.


It doesn't need to dry completely before removing the stencil. It just needs to set enough so it won't smear.


Here it is, with the stencil removed.


Throughout the process, it's important to make sure your slab remains pliable. I do this by spraying plastic and laying the slab over that. Then, periodically, I pick up the slab and spray some more. Since the slab is about 1/2" thick, this keeps the clay pliable, while still allowing the surface colors to dry.


Once my underglazes have dried so they're no longer tacky to the touch, I cut out my platter.


Now let's backtrack a couple of steps. While I was waiting for my underglazes to dry, I took a plaster hump mold and centered it on a foam bat. I'll be using this to shape my platter.

Here I've begun shaping the slab against the mold using a rubber rib. You could just as easily use a wooden one. The idea is initially to use lighter pressure, molding the clay to the shape of the mold.

I slowly increased pressure on the clay, both compressing the piece and trying to flatten out the textured layers from the carvings and the raised stencil parts. This is to prevent cracking from multiple sources: not enough compression of the slab (especially on a larger piece), stress from the carvings and raised lines from the stencil. This also gives a nice, smooth surface to the inside of the functional piece.

Compress, compress, compress.........

When I feel I've finished compressing, I take a serrated rib and score the bottom where I want to place my foot. I do this while the wheel is moving, making it simple to be sure the foot will be centered. The step missing here is that I trimmed the rim of the platter with the pointed tip of a sculpting stick. Then I used a damp sponge to smooth off the sharp edge. Then I just trimmed up a little along the inside. I smooth that off when the platter is removed from the mold.


Then I put slip over the scoring. I'm using slip made from my clay body with water and a little vinegar to act as a flocculant.

I've made a coil using a handle cutter. You could just as easily roll one or use an extruder. I've scored the coil, slipped it, and joined it to the bottom of my platter.

I laid the ends of the coil one over the other and make an angular cut through both, to create a joining edge. I set the wheel to spin and work with the foot, centering it and bringing clay down to join it seamlessly to the body of the platter. I work on this a bit, making sure the foot is compressed, centered, and well joined.

Here's a photo of the finished platter (note the cleaned up edge), and a bit of the tile with Amethyst having been painted over the white base.


 The technique has all sorts of possibilities. I encouraged my students to play with it, telling them I'd love to see where they take it and how they make it their own.

Sunday, November 07, 2010

My recent labor of love, the Representational Seder Set is done and it is, if I may say so with the greatest of humility, wonderful! I know this is true because my husband, Avi, says so!

Rep Seder Set ALL 2

Here are the pieces and a bit of the thought behind them. The photo precedes the explanations for the pieces.:

Rep Seder Set charoset karpas

Charoset - Charoset symbolizes the mortar with which the Israelites bonded bricks when they were enslaved in Ancient Egypt. The word Charoset comes from the Hebrew word cheres which means clay. In the representational set, the charoset is held the bowl with bricks impressed on the outside.

Karpas There is a green, leafy vegetable (usually celery or parsley/lettuce) called karpas which reminds the participants that Passover corresponds with Spring and the harvest, which, in ancient times was a cause for celebration by itself. A more contemporary interpretation links karpas with the biblical description of the Hebrew slaves marking their doorposts at the time of the first Passover. A bunch of hyssop was to be dipped in the blood of the paschal lamb and used to strike the lintel and the doorposts (Exodus 12:22) so that the tenth plague (death of the firstborn) would not be visited upon their households. In the representational set, karpas is symbolized by a container mimicking the wood of the doors and the crossbeam of the lintel over that door.

Rep Seder Set maror chazeret
 
Maror and Chazeret The word maror comes from the Hebrew word mar, which means bitter. The seder plate usually contains two places for maror (bitter herbs), representing the bitterness of slavery. There are two places, called maror and chazeret, since the commandment (Numbers 9:11) to eat the paschal lamb "with unleavened bread and bitter herbs" uses the plural ("bitter herbs"). In the representational set, the maror and chazeret are linked by the use of a yoke and rope, symbolizing the years of slavery our people endured.

Rep Seder Set zeroah baytzah
 
Zeroa The zeroa (roasted shank bone) represents God's mighty arm when he freed the jews from slavery in Egypt. The zeroa is also symbolic of the Paschal lamb offered as the Passover sacrifice in the Jerusalem Temple. The platform altar is the representational piece in this set.

Baytzah The seder also uses a hard-boiled egg called a baytzah which represents the second offerings given at the temple in Jerusalem on Passover, Shavuot, and Sukkot. The roasted egg is symbolic of the festival sacrifice made in biblical times. On Passover, an additional sacrifice (the Paschal lamb) was offered as well. In the representational set, the nest holds the baytzah (egg).

Rep Seder Set Salt Water 2

Salt WaterDuring the course of the Seder, the karpas is dipped in salt water to represent tears. The set includes a tear-shaped bowl with colors mimicking the different depths of the Red Sea.

Friday, January 09, 2009


It's nice to have a friend who makes wonderful doodles. Especially when he leaves them at your house, they inspire you, and then you get permission from him to use one of them as a centerpiece on your new deconstructed Seder set for Passover.

Thanks David!

Friday, November 07, 2008


Aaargh! The bowl was beautifully shaped and the wheel process went without a hitch. The trimming was done at that perfect point of leather -- when the clay comes off in beautiful ribbons. Then the feet were sooo pretty.

But the glazing!! I couldn't get the outside glaze (Electric Blue) to adhere properly. I knew I was being lazy when I put it on the glaze firing shelf. I should have taken the extra time to clean off the outside and redo it properly. But I hoped against hope that doctoring the dry glaze by rubbing it gently so the crack lines disappeared would work. It didn't.

Moral of the story -- NEVER be lazy with your ceramic pieces.

At least I have a nice bowl for when I eat my popcorn while watching tv...........