Showing posts with label april grunspan. Show all posts

Friday, July 12, 2013

What to Do with Seconds

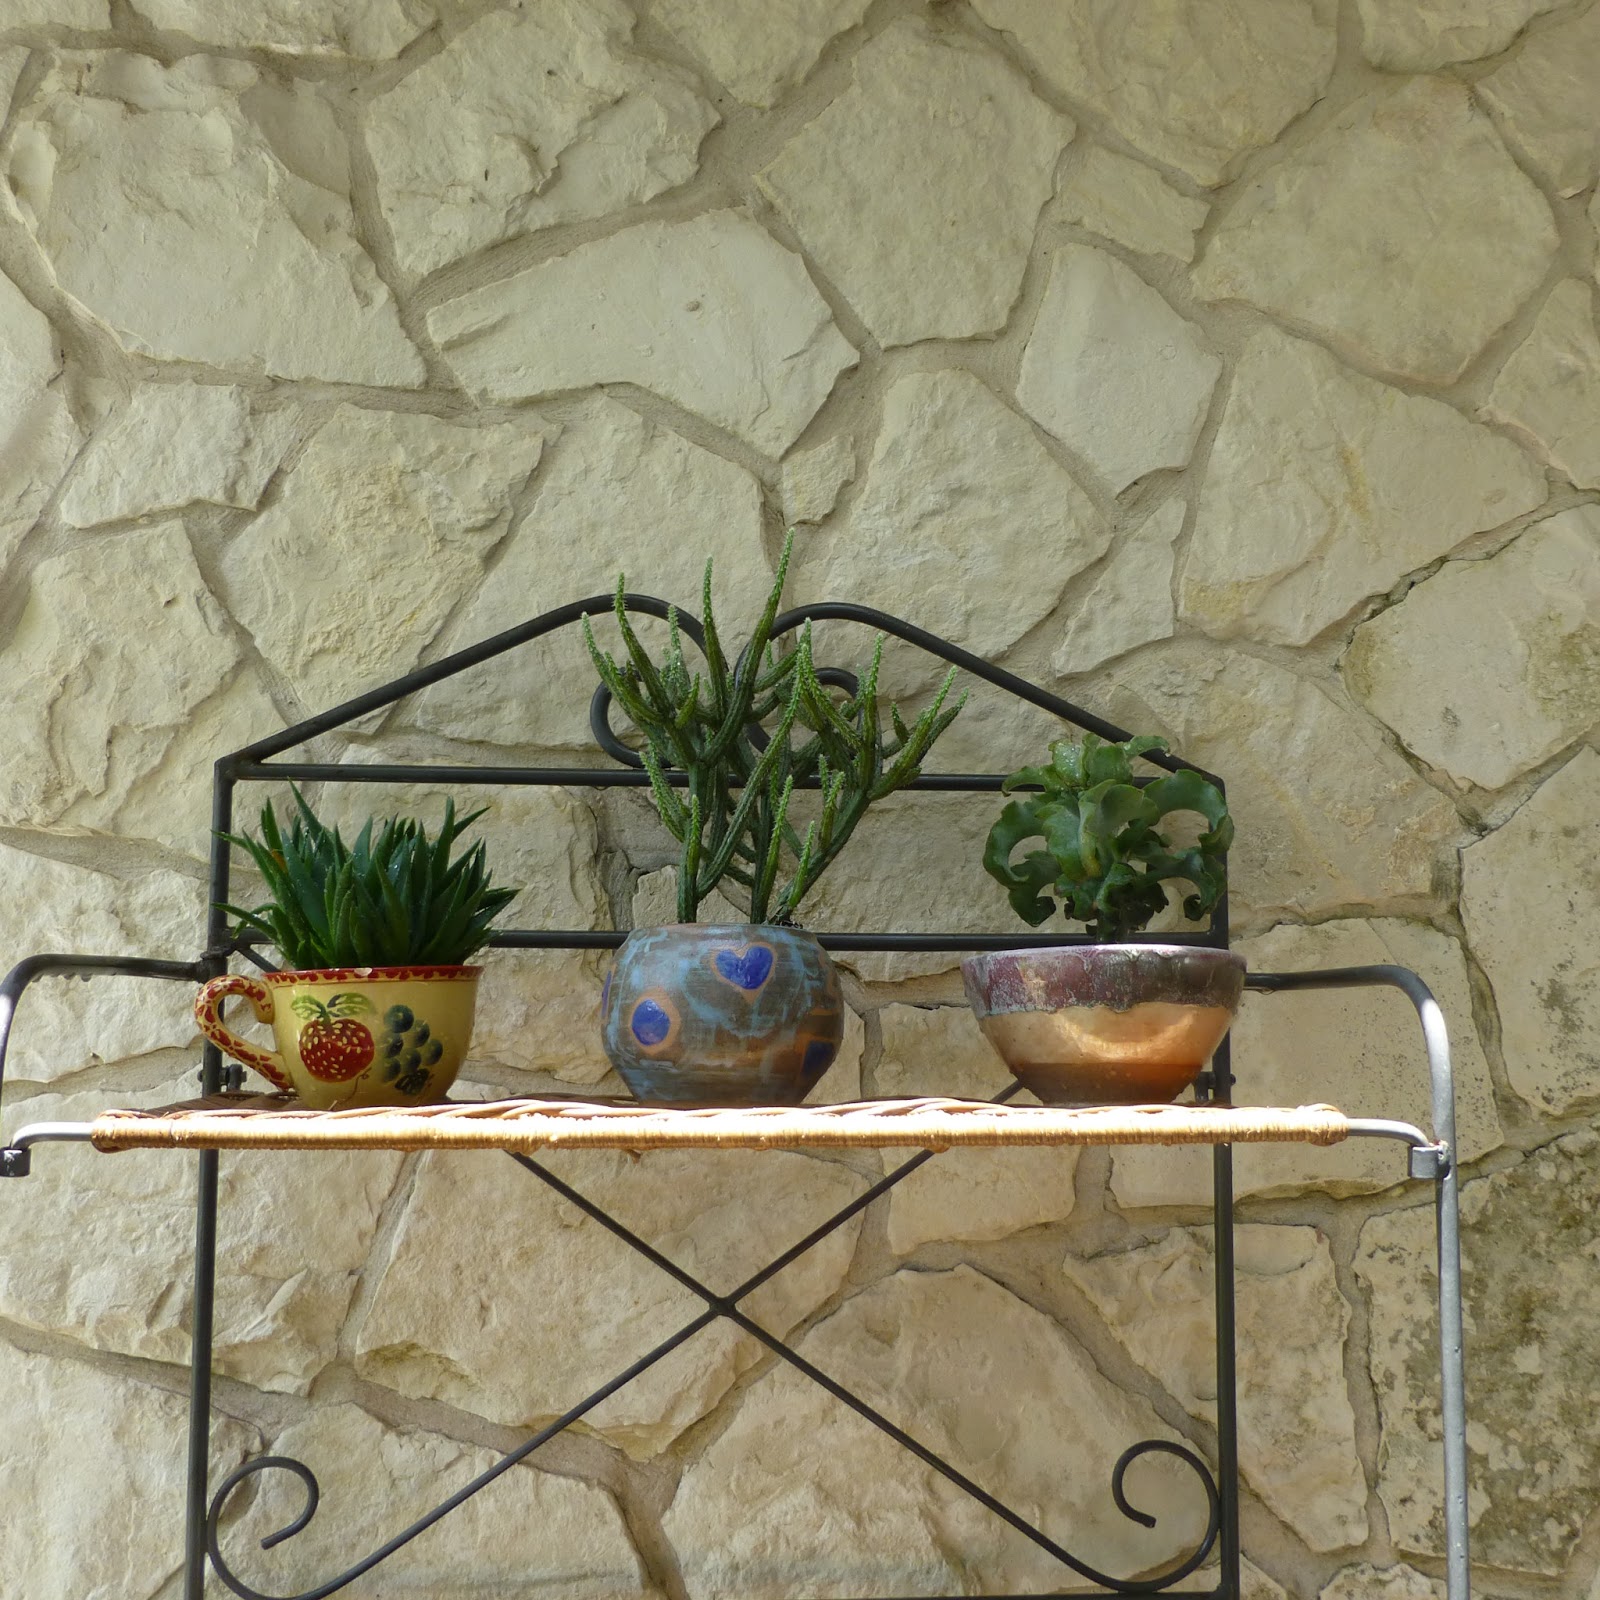
With a garden full of new landscaping/hardscaping and a bunch of pottery seconds sitting in my house, I decided to take action and enhance our new front patio.

Happily, on large trash day, Avie found a discarded baker's rack, which we absconded with and put up in front. Then I checked out my seconds, consisting of pieces I'd made which had something I didn't like. I also took a trip to our local Goodwill for a few extra pieces, to fill in the blanks. Then I tallied up the sizes of our pottery pieces.

Finally, we went over to our favorite garden shop and purchased a lot of succulents to fit into these vessels. The result: NICE!!!!


As time goes on, I'll see how these cuties do. I'll probably add to the collection as I accumulate more pottery seconds, or find some in the wild.

What do you do with YOUR seconds?

Saturday, March 16, 2013

NCECA is Coming Up Fast!

This coming Wednesday I'll be driving out to Houston with at least two of my pottery friends to attend this year's NCECA (National Council on the Education for the Ceramic Arts) conference. It will be my second time attending and there will be lots to see and learn.

What am I most excited about? There are several things.

I'm delighted they're having a process room, with different presentations on specific techniques which I can incorporate into my pieces. There are also some top notch artists speaking on their work and doing demos. I'm particularly looking forward to Christa Assad, Kristen Kieffer, Tom Coleman, Marion Angelica, and Jake Allee (a potter from whom I've already had a workshop).

And, as if I didn't need more mugs, I'm also quite excited to donate to and purchase from their annual mug sale, benefitting scholarships for ceramics students.

Finally, I anticipate dropping a bit of "change" in the vendor's hall. Last year in Seattle there were a few things I wanted which were too large to get home on the airplane. This year I'll have my van, making things much easier to transport. Whether that's a good thing or a bad thing will soon be discovered.

Stay tuned for photos and comments on all I've seen and learned!

Friday, October 26, 2012

Of Nature and Inspiration: Snowy Owl Project

Inspiration can come from many places. In this case, it came from a PBS show in the Nature series. This particular one was about Snowy Owls -- my favorite bird, and one we were privileged to see on a birding trip to Amherst Island in Ontario, Canada one February, many years ago.

The Snowy Owl is one of the largest owls in the world. That, combined with their striking white feathers and incredibly golden yellow eyes.....well, you know!

So I've decided to make mugs, using those eyes and that coloring. I intend to keep the mug white and use yellow and black underglazes to paint in the eyes and beak. Then, if I feel it's appropriate, I'll add some light carving to accentuate the feathering around the beak.

My concept is that the owl will be recognizeable, even in the absence of more details. I might even play with the mug's shape, to reflect the roundness of the Owl's head, though I'll have to make sure it doesn't lose function with that inward curve.

With an injured finger, I probably won't be back on the wheel until November. But that's soon enough and I can't wait to work on this idea!


Wednesday, April 11, 2012

The Kitchen Sink: A Mini-Master Workshop at NCECA

One of the presentations I attended at NCECA last month was a Mini-Master Workshop in the K-12 education programming schedule. I got there early so I could be one of the first 40 people who got to work with the clay. Anyone after that quota was filled attended as an observer.

I'm sharing this because I think it was a fabulous exercise in creativity, and not just for kids. I would even do it at the beginning of a handbuilding class and then, again, at the end, since it would be fascinating to see the evolution of one's skills and creativity.

We were given a coffee cup tray with three plastic cups containing some materials, a leather hard slab of clay, a soft block of clay, a small bottle of ugly green glaze, a brush, and a pencil. When they were put in front of us, we were told not to touch anything until after instructions had been given and we were told to begin.


We recognized what was in one of the cups: a cross between soft clay and slip. As for the other two cups, we kept looking and guessing.


Once all the trays were distributed, we were told we had been given clay in all its forms: wet, plastic, dry (the pieces that looked like rocks), and grog (fired clay broken up into very small pieces). We had to use up everything (EVERYTHING, including all the glaze, excluding the containers unless we wished to incorporate them) on our tray and make a head. We had 45 minutes to work. "GO!"

The results were interesting and outstanding. Rather than write more, I'll simply present a gallery of what people created.


The Gallery Show after we cleaned up from the workshop.


Sunday, April 08, 2012

NCECA Seattle

Just a short post with some photos from the 2012 NCECA (National Council on Education in the Ceramic Arts) Conference in Seattle. It was a great opportunity to see and hear what's going on in the larger world of pottery and ceramic arts, visit a great city, do a little birding (see my other blog), and visit with my son, Dan.

Visiting the vendor's exhibition space was like stepping into the Garden of Temptations. So many things I would have liked to have gotten. I guess it was lucky I had no space in my suitcase for the larger items, like a wonderful hump mold which fit over bat pins, and open forms for forming slabs. I'll be saving my pennies for next year, when I can drive to NCECA Houston.

Then there was the gallery exhibition, with several Washington art galleries selling select pieces of pottery and art. I wanted to resist. Truly I did. But one plate screamed "buy me": a handbuild beauty with a Snowy Owls on it.


The Gallery Exhibition

My Plate!
I also donated a mug to the sale raising money for scholarships and purchased three. One was for a gift, the other two came home with me and are now being used in rotation with the rest of my beloved handmade coffee cups.

Mug Sale

As for the actual conference, it was an interesting melange of lectures, demos, discussions, and a "mini master class". I was kept pretty busy, going from place to place, often having to choose between a couple of different presentations which sounded appealing.

I think my favorites were the "mini master class" (I'll write more on this tomorrow), the talk about Contemporary Ceramic Art in Israel, and the tandem demo by Walter Keeler and Tip Toland.

Walter Keeler and his altered pieces

Tip Toland, whose work can only be described as "unbelievable"

My favorite slide from Contemporary Ceramic Arts in Israel. Take a closer look at the negative space between the vessels.
All in all, it was an extremely worthwhile event. Next year I'll have a better idea how to tackle it. For now, I think it will be fun applying some of the techniques I've acquired and seeing how the conferences inspirations interact with my work.

Thursday, January 12, 2012

Happy New Year!

I'm back in the studio and one of the things I'm working on is another Passover set with an Elijah and a Miriam cup. I wanted to use something different on the Miriam cup this time and came across these lampwork beads from an Etsy Israeli Artist named Meital Plotnik:

Distant Seas
Their color is absolutely luscious, bringing in the azure blue of the sea and the wonderfully feminine deep pink, their shape referencing, at least for me, a timbrel (tambourine).

The shape of the new Miriam's cup is a bit different than the previous, so it will be interesting to put it all together and see the effect. I still need to go out and find a chain. I'm hoping to find one which will be a bit easier to connect.

I've other multimedia ideas rolling around in my head, so stay tuned to the blog!

Friday, December 02, 2011

I know it's not even Chanukah yet -- but I believe in starting early, so I've been working on Passover these past few weeks.

Mostly, I've been intrigued by the new tradition of including a Miriam's Cup in the Seder ritual. The following is taken from a website dedicated to this new addition: "New rituals include the addition of "Miriam's cup," filled with water to symbolize Miriam's miraculous well (learn more about the origin of Miriam's cup and the Legend of Miriam's Well). The well was given by G-d in honor of Miriam, the prophetess, and nurtured the Israelites throughout their journey in the desert."

When creating Jewish ritual art I always look at the representational derivation of objects and try to incorporate the functionality of the item with its significance. Designing a matched yet unmatched set of cups for Elijah and Miriam presented a new challenge which required some research.
Miriam was the eldest sister to Moses and Aaron. She is reputed to have prophesied, before Moses's birth, her parents would give birth to the person who would bring about the Jewish people's redemption. She was also the one who watched over Moses in the bulrushes, seeing him rescued by Pharoah's daughter. During the Exodus, Miriam led the women of Israel with timbrels (tambourines) to sing and dance in celebration after Pharaoh's men were drowned in the sea. 

My final design, incorporated the concept of Miriam's well, the idea of women wearing jewelry, and a reference to timbrels in this ritual cup.

Miriam's Cup

I purchased some delicate chain and was lucky enough to find charms which looked like stylized timbrels. When the pottery part was finished, I threaded the chain through the holes, adding the charms along the way. Unfortunately, the chain I purchased, although beautiful and delicate, was too delicate for the jump rings I had. So, I improvised and used cotton thread to tie the ends together. Since the cup shouldn't receive hard use, I think this will suffice.

Then I had to consider how to make a complementary Elijah's Cup. Rather than simply making a traditional wine cup, I wanted a cup embodying the Prophet himself, so I did some research. What caught me was how Elijah was "taken" up to the heavens by a fiery chariot, drawn by fiery horses. I decided the rim of my Elijah's cup should represent the joining of this fire opening up to the heavens.

Elijah's Cup
To emphasize the form, I glazed the pieces with a clear glaze to show off the simplicity of the white stoneware underneath. Altogether, I think the sum of the parts has a wonderful impact and should stand out on any Passover table:

Elijah's and Miriam's Cups Set


Sunday, November 13, 2011

The standing lamp for our "new" living room is finished. We took all the pieces and, this afternoon, put them together. I made sure to document the process (beginning with an earlier post chronicling the part where I made the different pottery components). So, here it goes.

First, our list of supplies:
A standing lamp (which we disassembled by removing the electric cord)
Pottery pieces (enough to go to the height of the decorative piece below the actual fixture), including a "cap" piece).
2" PVC pipe
Foam spray (to "set" the PVC pipe against the metal pole of the lamp).
Silicone (to attach and anchor the separate pottery pieces to each other).
A replacement plug (since we had to remove the old one to remove the wire so we could put the whole thing together -- a long story).

We took the PVC pipe and loaded the pottery pieces onto it. I'd already checked the height of the pieces against the lamp and, being really, REALLY lucky, they were the perfect height.


At this stage, everything was just sitting one on the other, so we could make adjustments and figure things out. We decided to switch the order of the pottery a little, switching around the bottom piece with the blue piece (fourth from the bottom).

Then we marked the PVC pipe where it needed to be cut and took everything apart again.

Then Avie, my favorite husband and incredible handyman, took the PVC pipe outside to cut. He cut it 1/4" below our marked line.

Then we brought it back in and put it on the lamp. At the top, we sprayed in some insulating foam sealant so the PVC pipe would be fixed in place. We only needed to do this at the top, since the bottom sat squarely around a "hump" from the lamp base, holding that part quite nicely. Then we allowed the foam to set for a few minutes.


The wire you see sticking up through the center is the guide wire we were going to use to pull the original electric cord back down through the lamp. We had to do this because you can't drop pottery pieces down with everything attached. We didn't think about this until we started looking at everything after we purchased this lamp at the Salvation Army.

When the foam had set up a little, we began loading on the pottery, putting a line of silicone where they joined the PVC and each other, to keep them secure and to prevent them from shifting.


Finally, we had all the pieces loaded.


When the insulating foam dries, it also expands. Avie trimmed the foam so it wouldn't block the threads where we would be screwing the lamp back together.

Then it was time to pull the electrical cord back through. He threaded the guide wire through the cord and gently used it to guide everything back through the bottom two holes of the lamp. It worked like a charm except, in the excitement, we'd forgotten to put the pottery finishing cap on. So, the first time was for practice. We put everything back the way it was, put on the cap, and rewired the lamp a second time.


Then it was just a matter of attaching the cap piece, attaching the new plug, screwing in the top, and making sure everything worked.

It did!
 
All in all, it was a fabulous experience resulting in a tremendous sense of pride AND a fabulous piece for the formal living room.

Let me know what YOU think!

Sunday, October 30, 2011

My husband Avi and I are big coffee snobs. Morning coffee during the week involves the use of a Chemex coffee maker, a special filter, recently roasted beans which we grind ourselves, and water heated to exactly 195 degrees on an induction cooktop. All in all, the process takes about 20 minutes and yields an incredibly complex and smooth cup o' Joe.

The other day, our favorite high end coffee shop, Local, offered a workshop in a new brewing system called the Clever. After the workshop, we got into a discussion with the other attendees about what, in their opinion, constitutes a perfect coffee cup.

First, and most importantly, we agreed many coffee cups are too large to savor well-brewed coffee. We want our coffee to be hot, accessible, and in a mug which allows us to savor rather than gulp. The general consensus was anything over 12 ounces was just too big.

As coffee cools, its flavor changes. One morning, when you have some extra time to really taste your coffee, play with this. Brew it, pour it into your cup, and taste it at different temperatures as it cools. You should note a change, even with cheap coffee. Coffee connoisseurs want a cup that allows them to enjoy their coffee, while keeping it above 134 degrees for the time it takes to sip and savor.

It's also important to consider the ergonomics of your cup -- how does it feel in the hand and against the lips?

For me, this means a hand-pulled handle. After all, what feels better in the hand than something shaped in the hand? Also take into account the particular size of the hand holding the cup. How many fingers will fit in that handle? Will it feel too large for a small hand? Will it be too tight for a large hand? In the art of cups or mugs one size does not fit all, so vary your designs to take this into account.

Don't make handles too thin, since that makes everything else about your cup feel flimsy and unbalanced. Don't put any fancy textures on them, braid three skinny coils, or do anything to detract from simply holding a cup to sip a beverage. A cup is a functional object; function should be integral to design.

As for the rim, too thick and it feels like you're going to lose your liquid, too thin and it will be too sharp against the lips or be liable to chipping with hard use (and coffee cups get hard use). I use the web area between my first and middle fingers over my rim as the just-thrown piece turns on the wheel to "finish" my rims. I've found that technique creates a rim which feels right against my lips.

Shape? I put a "waist" on my mugs. Personally, I like sticking my hand through the handle and holding the mug itself. This particular shape gives me something to hold that feels good in my hand. I also like this shape because it helps keep the coffee warm for a longer period of time. (I also leave the bottom part of my mug a bit thicker, to add some insulation.)

Granted, the mug below is a bit larger than I would like -- but not everything I make is for the coffee snob. The coffee snob is simply the focus of this particular post.


Let's conclude by turning to Daniel Rhodes and his wonderful book Pottery Form:

"The cup is such a simple form . . . . Its functional aspects are few. The cup works best if the height and width are about the same. The emphasis may be either toward the upright or the horizontal, but if the cup is too high it will be unstable. On the other hand, if it is too broad and low, the contained liquid will slosh and splash. In broad cups, hot liquid will cool too fast. If there is no handle, a foot will make the cup easier to pick up and to hold. The rim touching the lips is smooth and may turn outward slightly, but not inward. This edge or rim, if too thick, will feel awkward at the lips. Inside, the cup is smooth, without ridges or sharp corners. The scale is determined by the amount that is comfortable to drink at one time."

Keep on throwing!

Tuesday, October 18, 2011

Time for an update on the standing lamp.

All the pieces have been through both the bisque firing, been glazed with "Hi Fire Clear" and fired up to cone 5. I brought them home, all excited about putting the lamp together this evening. Here are the pieces lined up on our coffee table:

Then we hit our first glitch. I knew we would be able to unscrew the lamp pole from the base; but I completely forgot about the cord! And, this being a very commercial lamp (purchased used, but made in China), detaching the cord from anything proved to be more difficult than I thought.

When Avi (my husband) came home, we unscrewed the bulb housing, only to see the wires were permanently embedded in it. No unscrewing wires here.

For a bit, I pondered creating this as a non-functional piece of art. But Avi loves a good puzzle. In the end, we decided to cut off the plug, pull the wire out from the top, with a lead wire attached to help guide it back through when we're done putting everything together. The wire is out, with the lead wire still in place in the tube. It will be reattached to the power wire and pulled back down through when we're done with everything else. Then we'll just attach a new plug. I'm sure this is all clear as mud. At least Avi and I understand what we're doing.

Then we had fun trying to decide where each section would look best on the lamp. This was what we've come up with:
I've decided I need to make a "cap" to top off the stack and make it fit the top piece of the lamp more snugly. I wouldn't want to just leave a gaping hole at the top. I'll work on that tomorrow. I'm planning on making one concave and one convex, then deciding which I like best when they're done.
So, there'll be another lapse in time from now until the next post. Stay tuned for the next installment.

Thursday, September 29, 2011

You've seen the home side of the new living room project. Now I'll show you what's happening in the studio.

As I said in the previous post, I'm working on making a standing lamp from ceramics. The idea is to throw the lamp in sections. My forms are made so the bottom opening will sit just over the rim of the top opening, locking the pieces in place. They're thrown to fit around a two inch pvc (plastic plumbing) pipe, which will sit over the base lamp, pictured in the previous post. They won't sit right up against the pvc pipe. But there will be about a quarter to a half inch clearance between. Hopefully this will all be enough to keep the lamp stable. I'm assuming it won't be moved much and this will all work well.

So, the following photo is of some of the pieces thrown on the first day. I worked with 3-4 pounds of clay per piece, leaving a fairly thick wall for stability and strength.


I wanted the lamp to be colorful, but not enough to dominate the room. So, I decided to use underglazes and have one color family per piece. The base coat would be a light shade of the chosen color, after which I would sponge paint a darker shade over it to create some sort of pattern. Each piece would have a different pattern. There will probably be two pieces for each color family: red, purple, green, brown, blue. A few of the finished underglazed pieces are below:


I have about one more day's work before the pieces have all been underglazed and touched up. Stay tuned......

Monday, September 26, 2011

The "Cascade Effect" has hit my house. We decided to redo the formal living room, which has now spread to the family room AND the kitchen. Upholstered furniture has been purchased, but I HAVE to leave my mark on things. So, I have several projects in the mix -- one of them even involving clay!

The non-pottery designs are a coffee table and end tables featuring wonderful Chinese silk embroidery with birds as the unifying factor. I purchased an old coffee table, two square stools, and a couple of frames at the Salvation Army. The stools, with the seat removed, will be the bases for the end tables, with the framed embroidered pieces as the table tops. The coffee table will have a longer embroidered piece (purchased on e-bay) under cut glass.

 I'm going to remove the woven seats from the two stools, prime them and paint the bases black to go with the charcoal grey sofas we've ordered. The coffee table (sorry, didn't get a photo of it) will be painted the same way. Finally, a couple of coats of polyurethane will be painted on for a durable finish.

Here are the two smaller silk embroideries. One is already framed, although I might opt to replace it with a frame more like the one sitting in the chair as pictured in the third photo down.


And here's the lamp which will act as the foundation for my standing lamp:

A 2 inch pvc pipe will go over the rod part of the lamp to better anchor the 6 or 7 ceramic cylinders that will be my contribution to its beautification. I'm debating whether to run the ceramic parts of the lamp over the open ironwork and up below the lampshade (so no dark metal shows except for the base), or to use the openwork as an accent. I might make pieces that work both ways and decide when I'm putting the pieces together.

I'll try and remember my camera when I go to the studio tomorrow to show you the individual pieces of pottery, which will be stacked on each other to create my standing lamp.